Аоао
1 year, 1 month
Ичя мы пра
Ичя мы пра
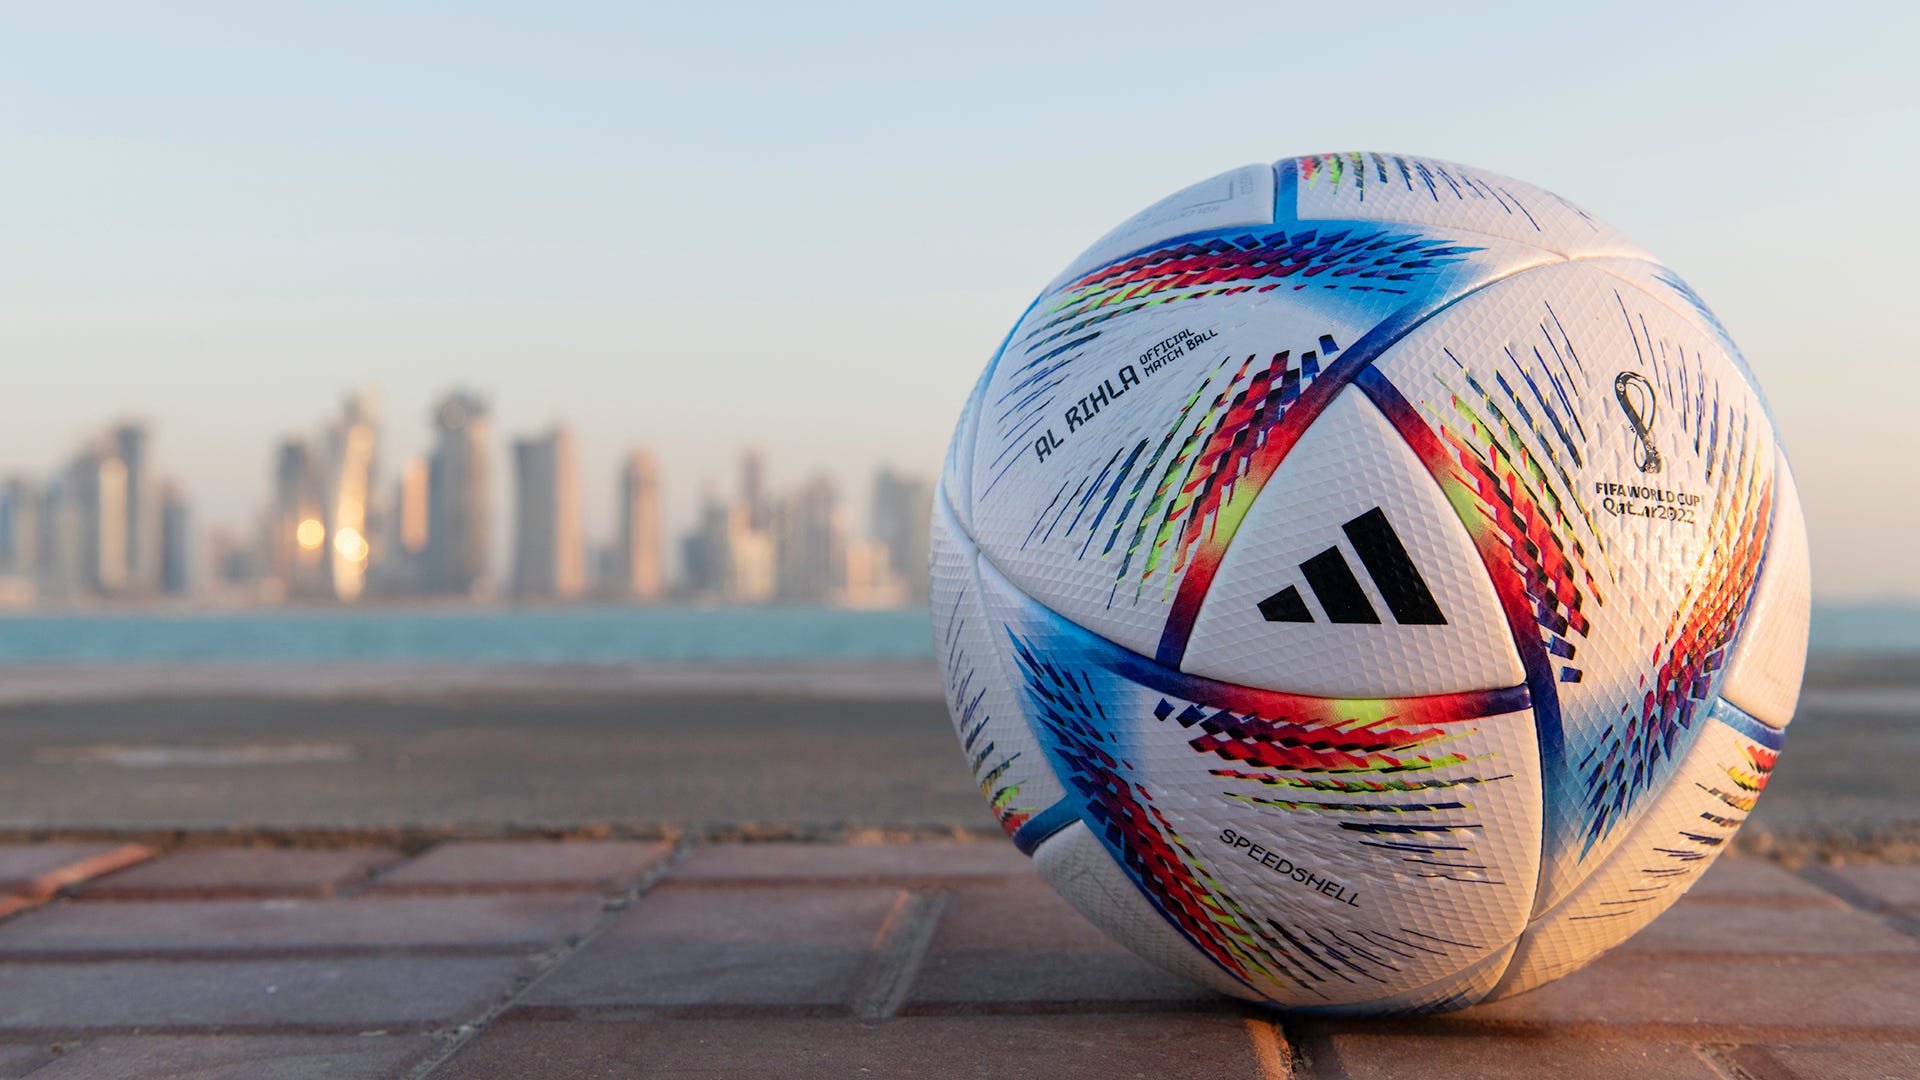
I want to go over my process of how to make a football ball from WC 2022 named Al Rihla. It's a very cool looking piece of equipment and it was surprisingly more tricky than I thought. So this is what I managed to get in the end.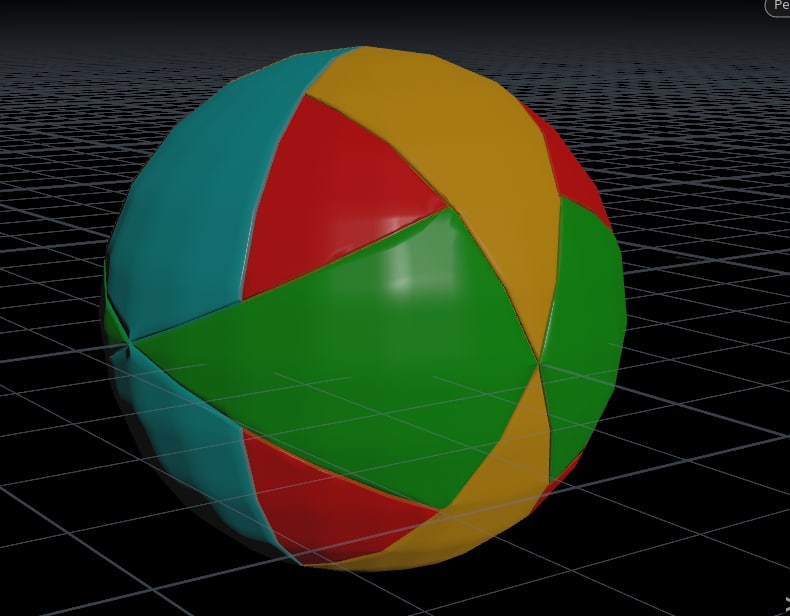
When you first see the ball you immediately think "oh, that's just 3 triangles" and you think that you figured it out.
And you would be correct if you tried to model it by hand. Because than you can just eyeball it and make seams work. But I wanted to do it fully procedurally. So I had to find out how exactly those triangles intersect.
At first I tried to brute force it and just create those arrowhead shapes, project onto surface and boolean those from solid sphere. But the reality is that on sphere poles geometry would widen and on equator it would shrink. And I arrived to this state.
 |
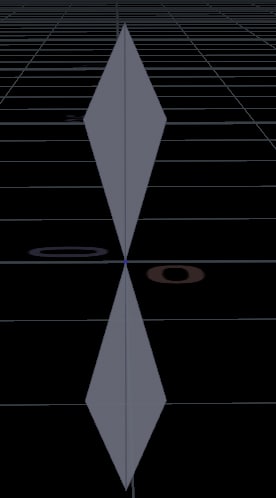 |
On the right you can see the origianl shape and on the left how the projection looks like. So it definitely wasn't the right way.
I even disected the hand-modeled mesh to see how the shapes look like. And then I started to see the pattern..
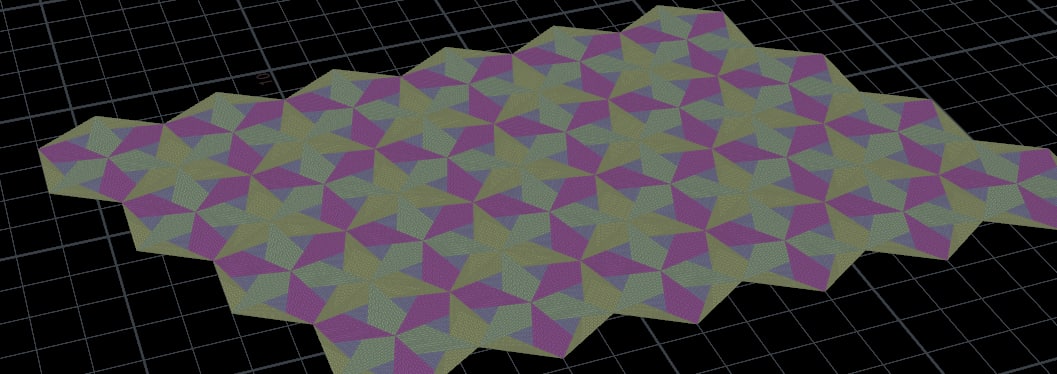
Long time ago I remember doing a tutorial on how to make Brazuca ball and it had pretty complex pattern, so I thought - hey, good idea to do the same. The idea was to map the pattern on a flat plane and then go and spherify it. And so after looking at the photos and models I came to this pattern.
Looks very solid and it seems like this is it. But then the reality of spherification came. The problem with the equator persisted. So then I thought "Wait! What if I convert this into hexagon and then subdivide to sphere?". And this is what happened.
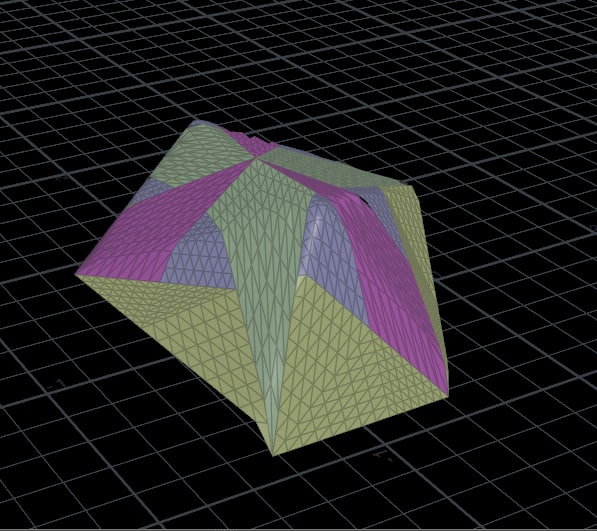
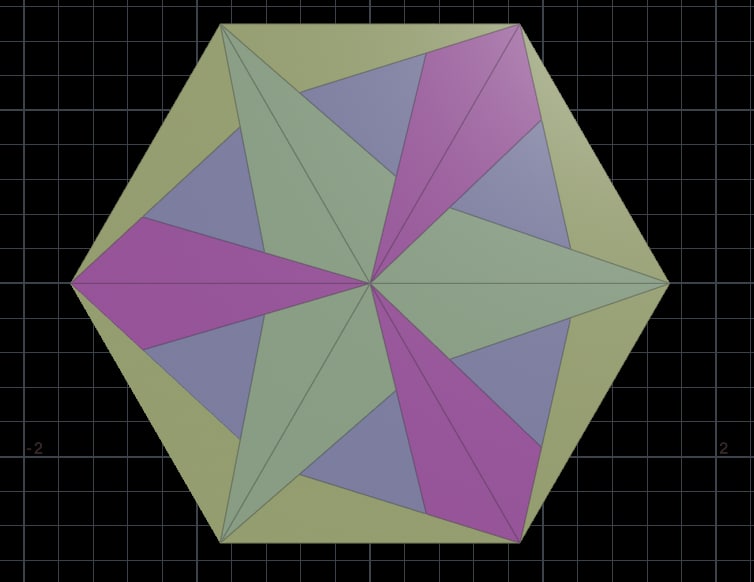
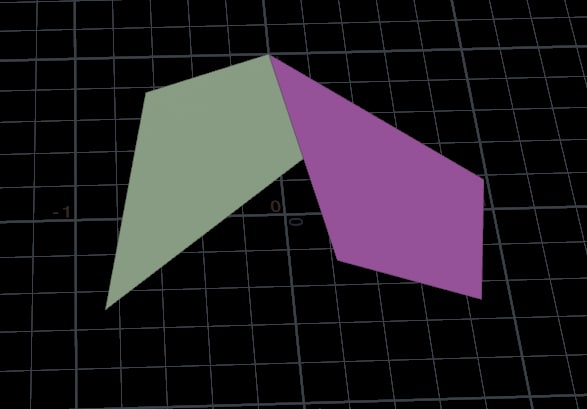
Another failed attempt. Worth pointing out that at that moment there were no schemes of how to sew the real ball. So I just had to guess. Next idea was that my problem is in hexagon shape. And I need to make it more simple. So I came to a nice pattern that could be achived with just 2 arrowheads and it was sort-of penrose tile ish.
And these are two shapes that I was testing out.
 |
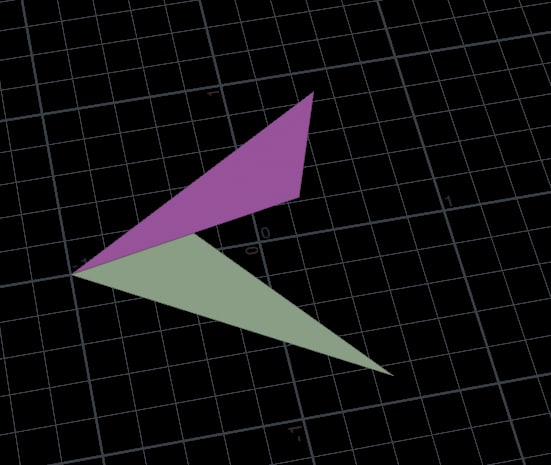 |
But this approach wasn't succesfull either. Whatever I was doing wasn't working. It's either the problem with spherification or the pattern wouldn't stitch together. And lastly! I managed to get it!
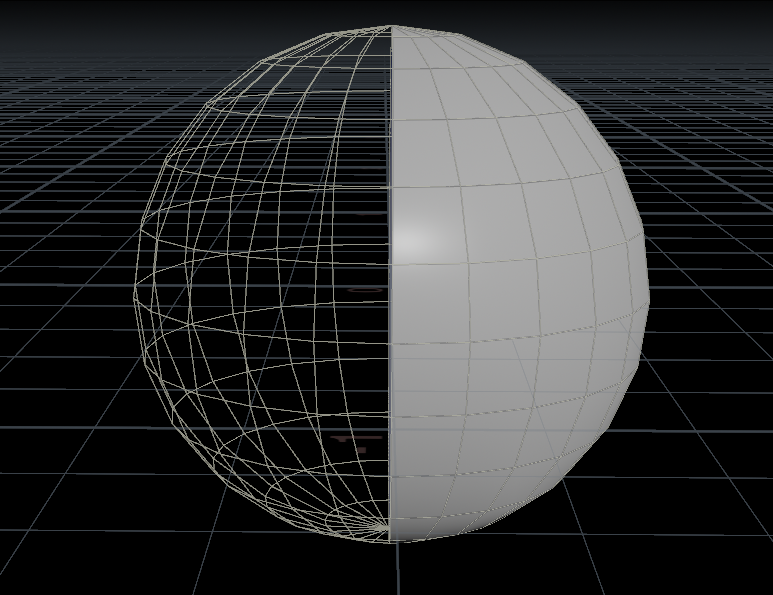
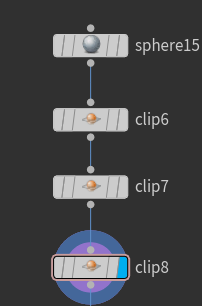
At first you create a sphere and with the "Clip" node cut a half of it.
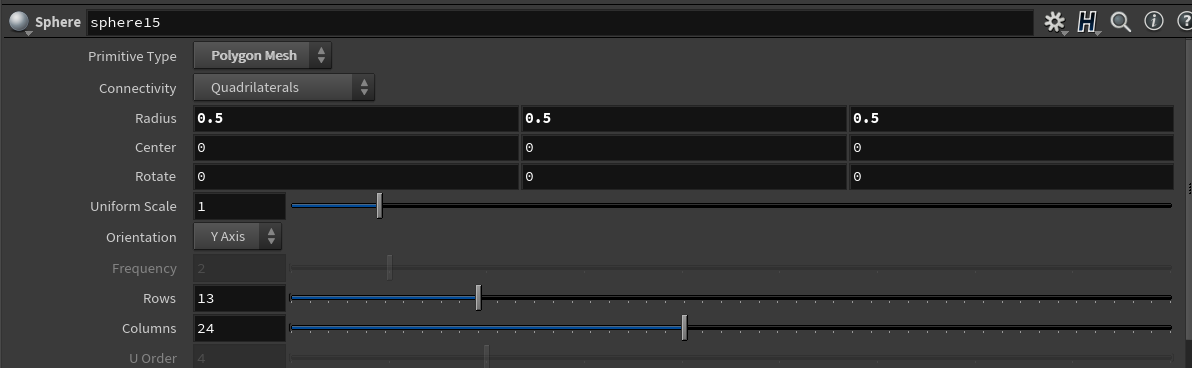
These are the settings for the sphere node. Nothing unusual here.
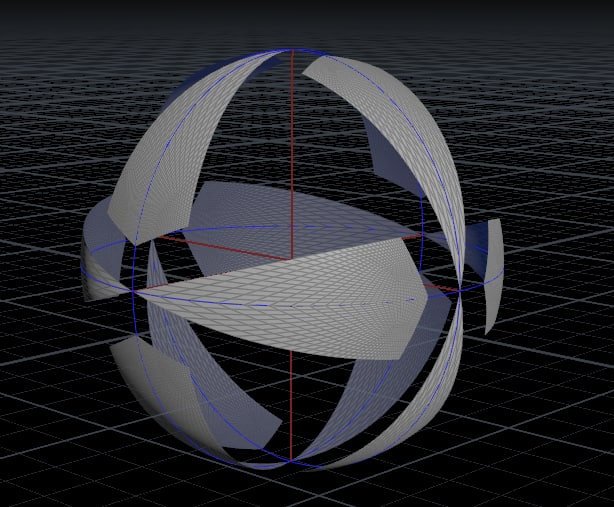
Then by using 2 more "Clip" nodes you need to get a 1/8 of a sphere. It will look like this.
 |
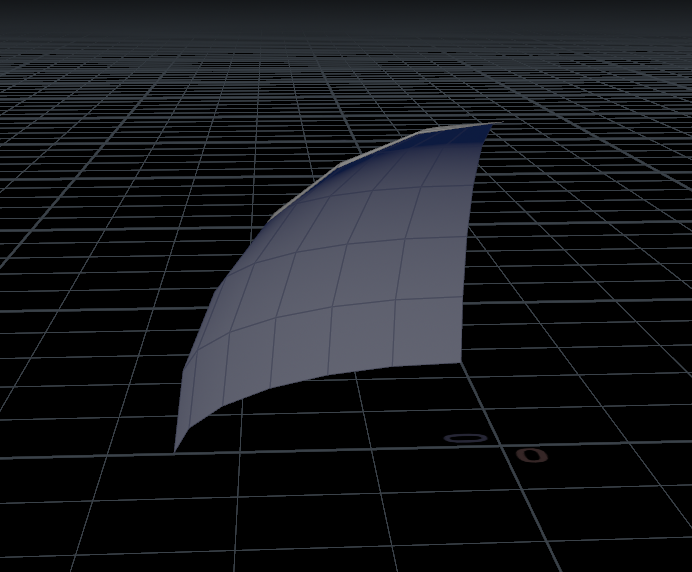 |
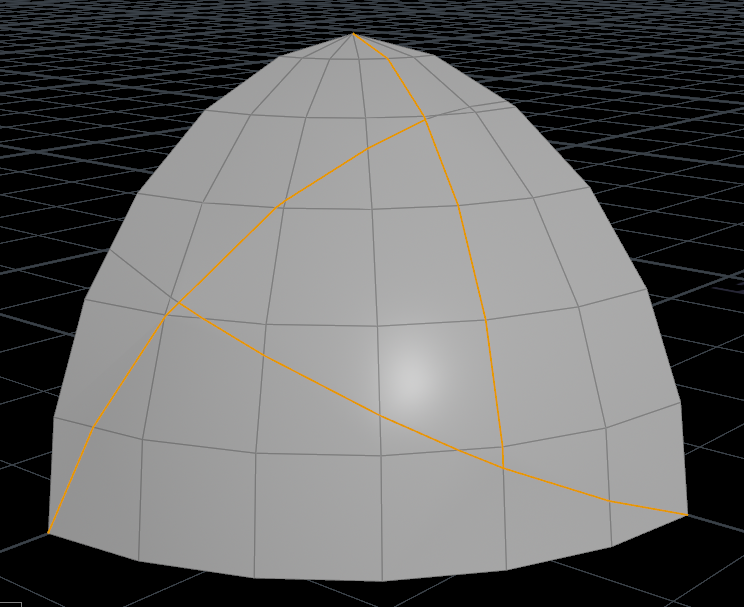
Next step would be a bit tricky. So you need to make cuts along the sphere surface at specific angles and make sure that those cuts are actually going from a specific point. Because by default "knife" node cuts in a planar mode and we need spherical. To do this we just need to feed cos and sin into the direction that's are being calculated from the angle.
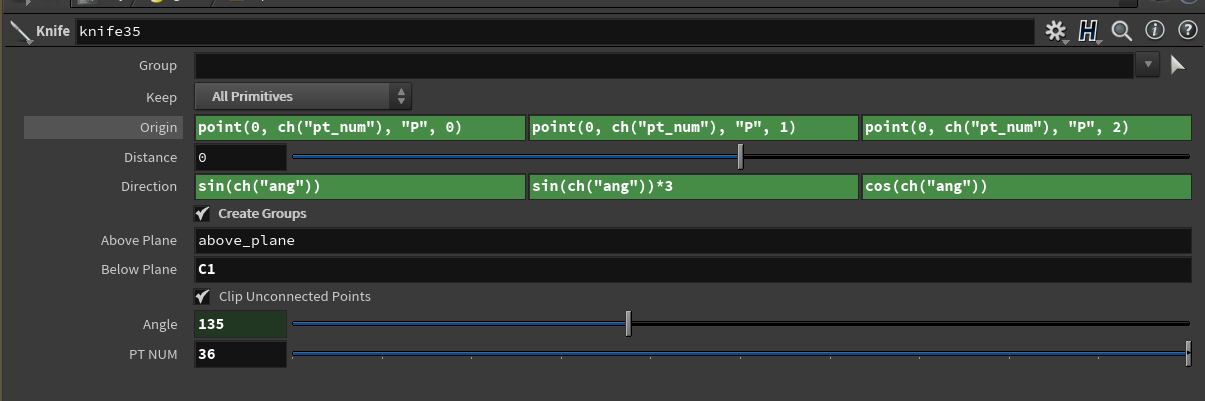
In the origin we specify which point is going to be the "root" of the disection. I've decided to put it into the parameter. But I just chose the bottom right corner one.
In the direction simple sine and cosine formulas to make line go in a spherical direction. If you ever made a procedural circle - you would be familiar with this combo. And this is how I get the first cut.
Now you have to repeat this process 2 more times. But for the bottom left angle you would need to use another sequence of functions.

And lastly for the top point you actually don't need to calculate the Y axis transformation, only X and Z.

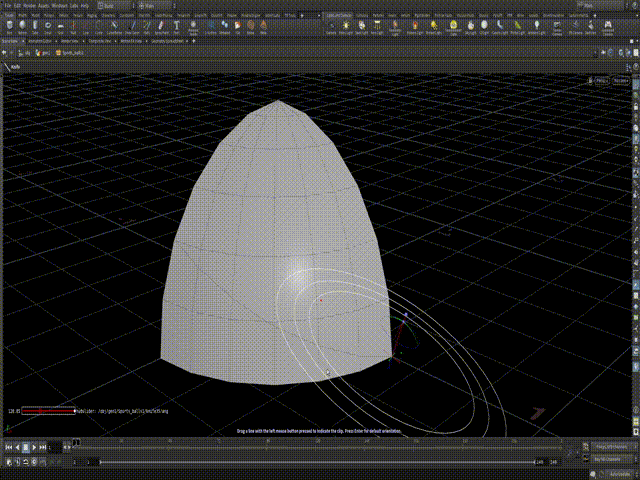
After doing these three operations you will have multiple goups that are being cut. So you need to recombine them in a meaningfull manner. It will look something like this.
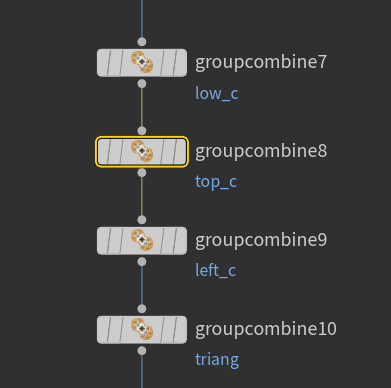
 Then, you just need to promote all the primitive groups to edges to get those sewing lines in the ball. In the setting make sure to check "Keep original group", "Include only elements in the boundary". And don't include unshared edges.
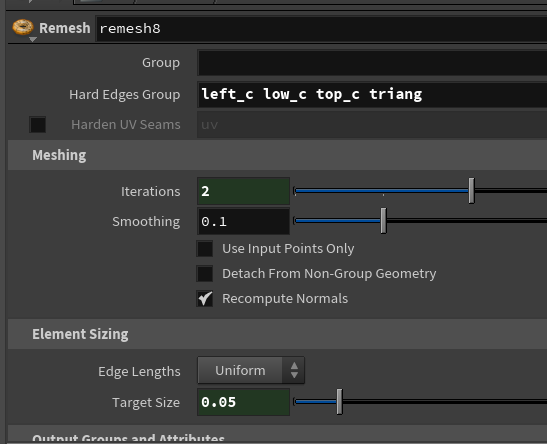
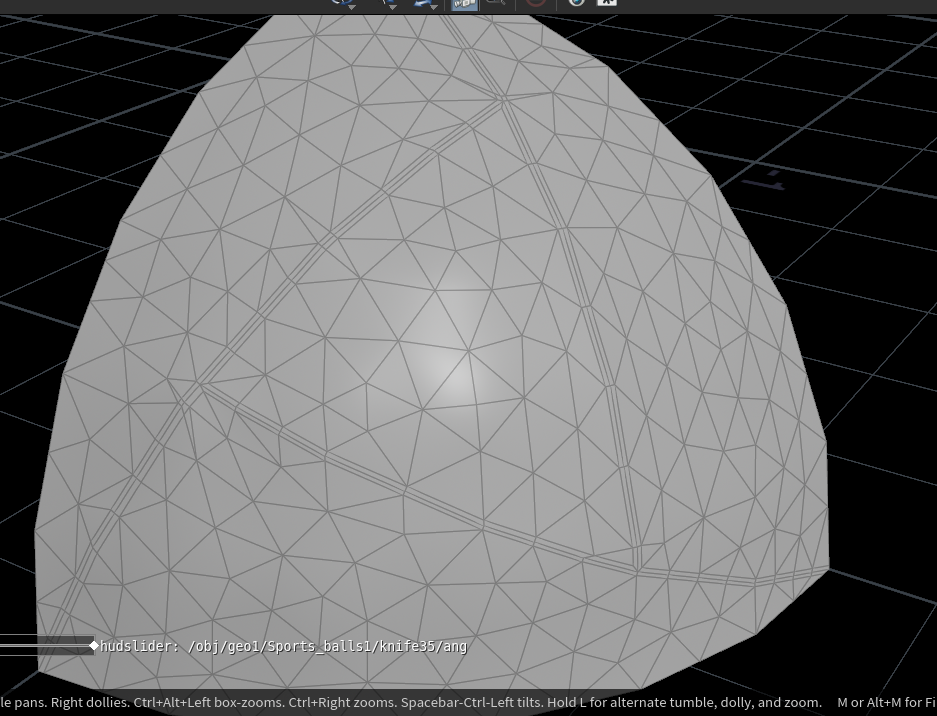
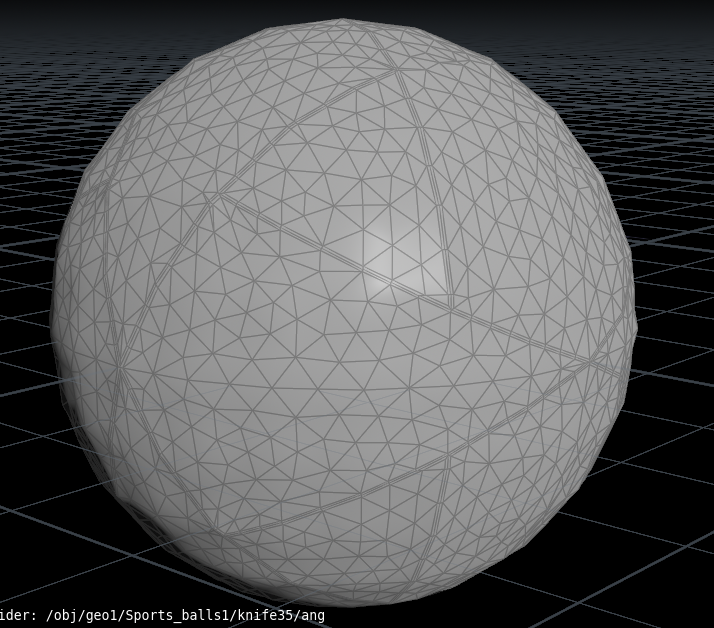
Next step would be to remesh this and don't forget to specify those edge groups as hard edges!
 |
 |
In the bevel node just add a bit of chamfer to the stitch lines.
 |
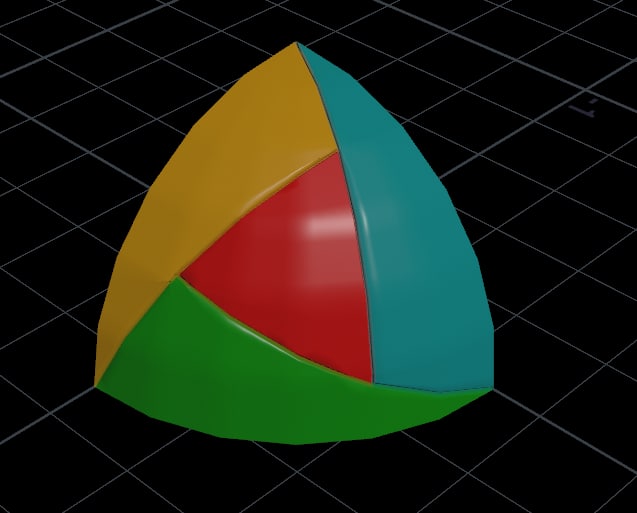 |
And this is your sweet sweet 1/8 of an Al Rihla. All that's left to do is to mirror this beauty and you will get your ball!
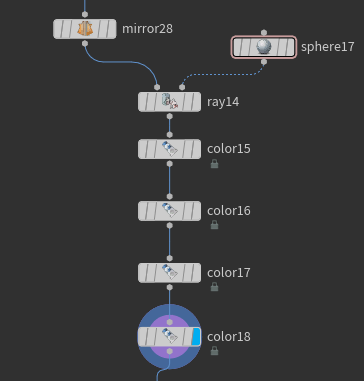
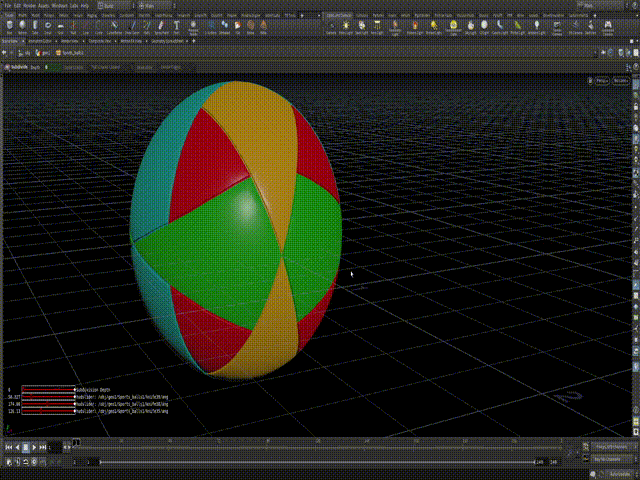
But after all these manipulations you notice that it's not that perfectly round. Mostly because of the hard edges and how we mirrored it. So to fix this let's reproject this onto a perfect sphere by using "Ray" node. And after that let's color our groups to better see different areas.
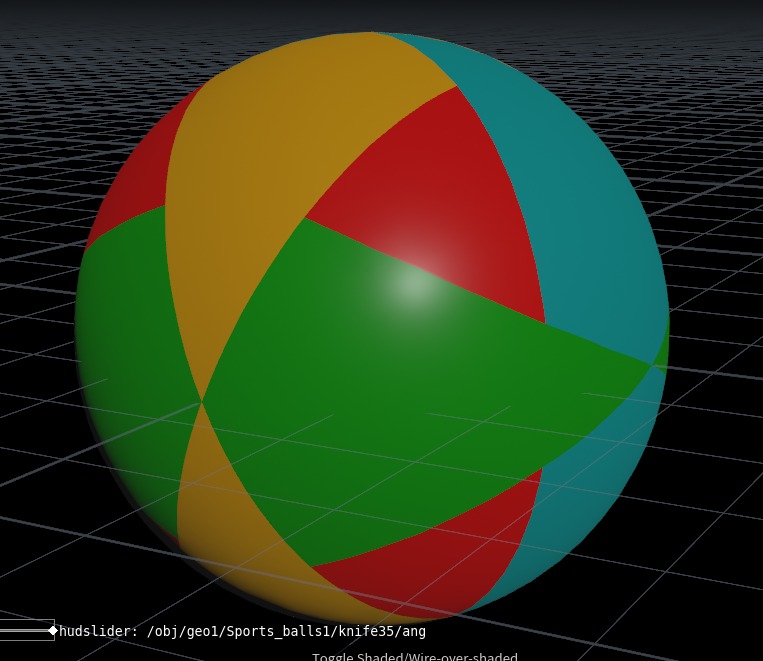 |
 |
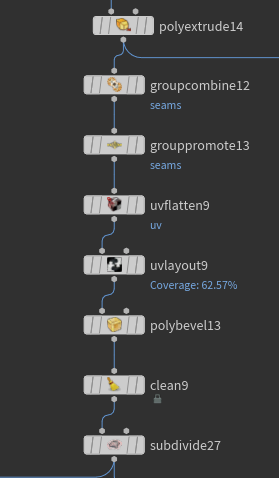
After this point it's up to you how you want to tackle detailing of the ball. I went simple route. Extruded by group, got my seams for the UVs, applied small bevel to soften edges and in the end subdivision node to add even more roundess.
And this is how you get your parametric football ball Al Rihla. It was a very interesting and surprisnigly challenging couple of evengings.Now you can go and change your angles of cutting to get different results, have diferent extrudes, width of stitching etc.
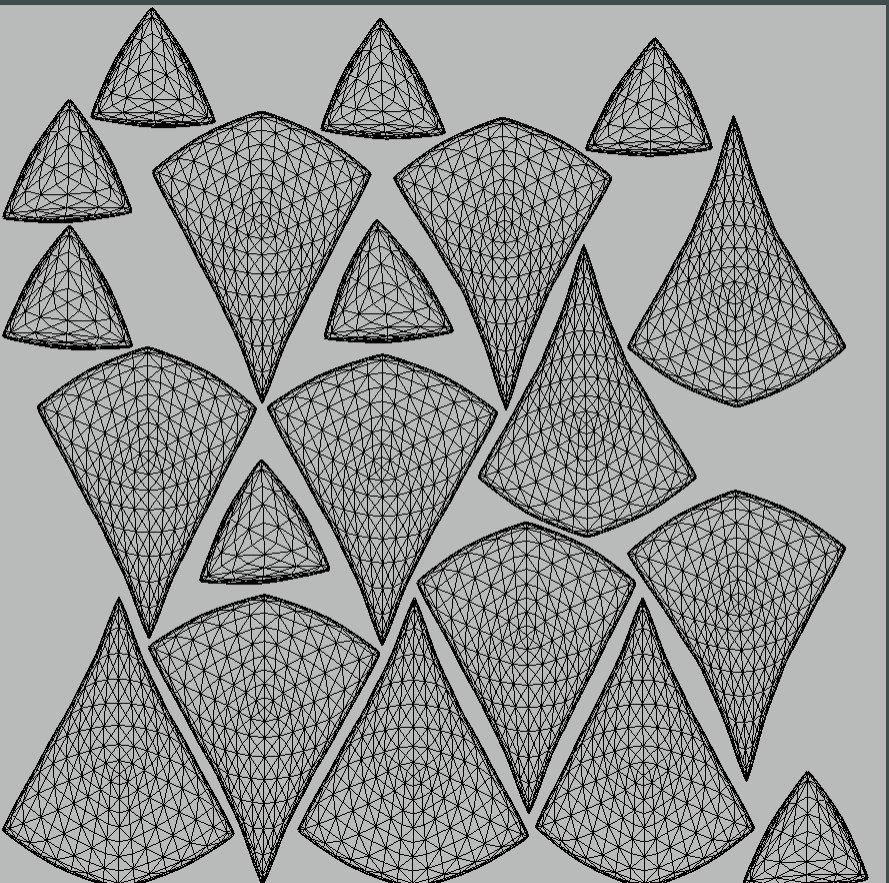
One this that I'd suggest to play around with as well is the sphere relaxation of geometry. Because in real world it's rare when something is perfectly round. So whenever I wanted to spawn lots of ball I'd use the relax VEX function to make them a bit more believable in mass. Just run it point wrangle.
Category: Houdini